

Setting up a development environment
- hkerr961
- Aug 4, 2023
- 5 min read
Updated: Aug 12, 2023
So you’re ready to get started coding - love that for you. But if you’re new to all this, it will help to first get a development environment set up and get an understanding of how to write, run, and manage programs and projects.
In my first article we wrote and ran a python program using Notepad, or your preferred plain text editor, and ran it from a command line terminal. Check it out here if you missed it. That worked great for that simple program, but what happens when we’ve got more than just a few lines of code? What if there’s more than one file, lots of programs that interact and rely on each other, or we need to import libraries? Data? What if we want to test out our code so we know it all works the way we think it should?
It can get pretty complicated pretty quickly. Never fear, IDE’s are here. IDE stands for integrated development environment and it’s another software that lets you easily store, organize and write code and applications.
IDE’s are a graphical user interface where developers can write, run, and test projects all in one place. There are also so many different libraries and plug-ins that help with the writing and making development much smoother through things like syntax highlighting and guiding.
There are so many different IDE’s out there, all of which boast their latest and greatest features, but they all more or less do the same things. Each developer usually finds one that works for them best and might use different ones depending on what language they are developing in. And, the more you develop, the more you’ll customize and be able to do things with your development environment.
Project Organization
I like to keep my coding projects stored within a development folder which I have super creatively named code. Then within this folder I create a folder for each language or framework, and store my projects within the corresponding folder. If you're using Windows it's best to create this directory under the :C drive, and then under your user if you're on a shared computer. How you organize your coding projects on your computer is really up to what makes the most sense to you.
Since we’re mainly going to be sticking to Python, create a folder named python in your new development folder.
Like I said above, every developer has different preferences when it comes to their development environment, and they are things you’ll figure out along the way, this is how I set mine up, take from it what works for you and leave the rest.
Code Editor
A code editor is arguably the most important part of your development environment. This is your workspace where you actually write and test your code.
Today we are going to be setting up one of the most used IDE’s out there - Visual Studio Code, and we’ll be setting it up to run primarily python projects. Visual Studio Code is a great choice because it’s free, powerful, has so many plug-ins and extensions available, and it's not language specific. You can write pretty much every programming language in Visual Studio Code, so you don’t have to learn the ins and outs of a new IDE every time you switch languages.
Let’s start by downloading Visual Studio Code.
Head to the official Visual Studio Code website where you can download the latest stable release. Double click on the file once it’s downloaded and that will launch the installer.

By default, VS code will be installed and stored in the location: C:\Users\{your username}\AppData\Local\Programs\Microsoft VS Code. This location should be fine but if you know what you’re doing and want to change it, enter a different file path into the installer prompt.
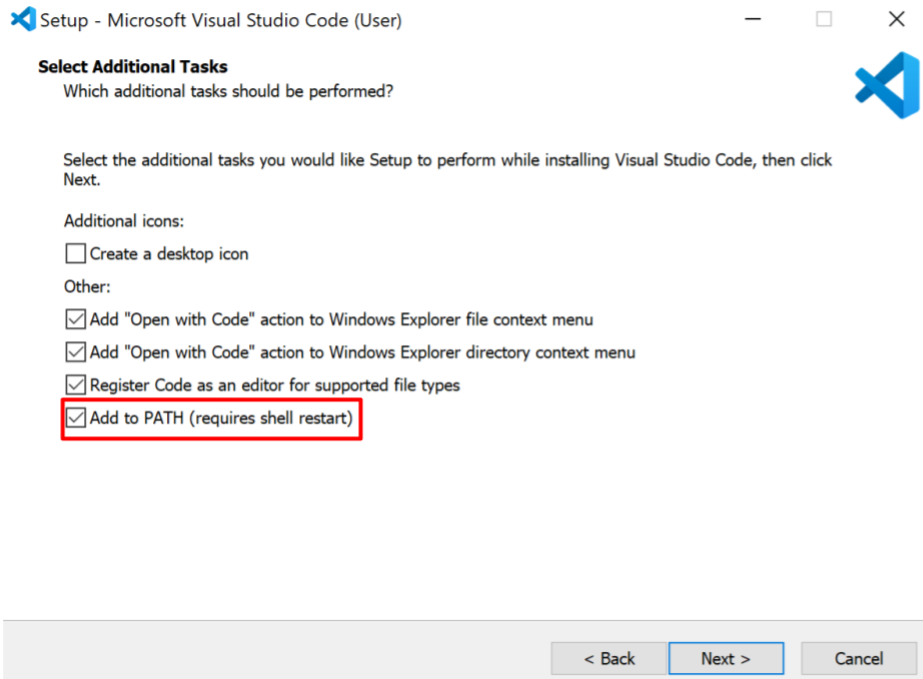
Be sure to leave the add to path box checked, as this will add VS Code to your system path and you will be able to launch VSCode from a terminal with the ‘code’ command.
Let the installer do its thing and when it’s done, VSCode should launch automatically and look something like this:

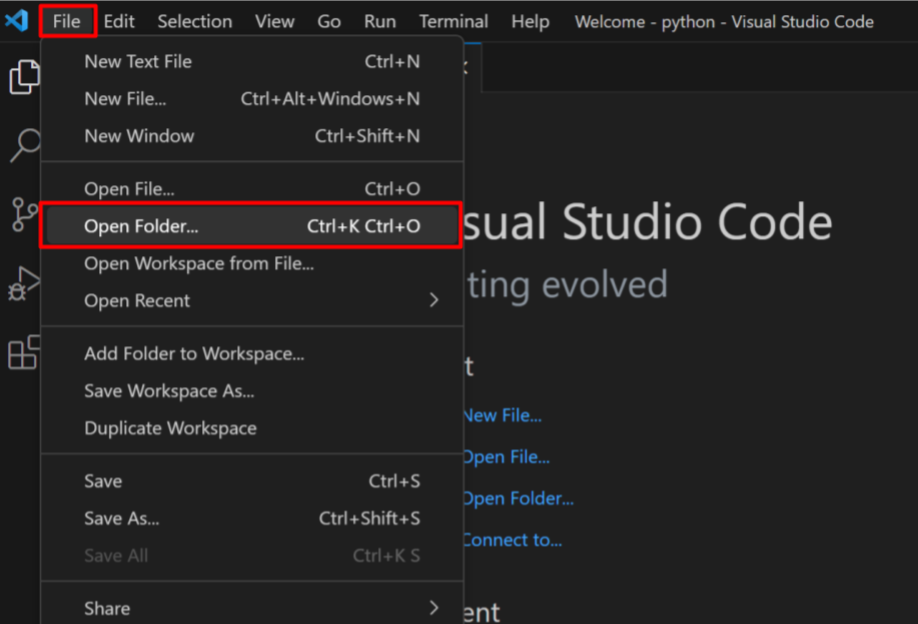
Now we want to work within the development folders we created earlier.
To do that, click on File in the upper right corner and select Open folder and then in the file explorer find and select your development folder.
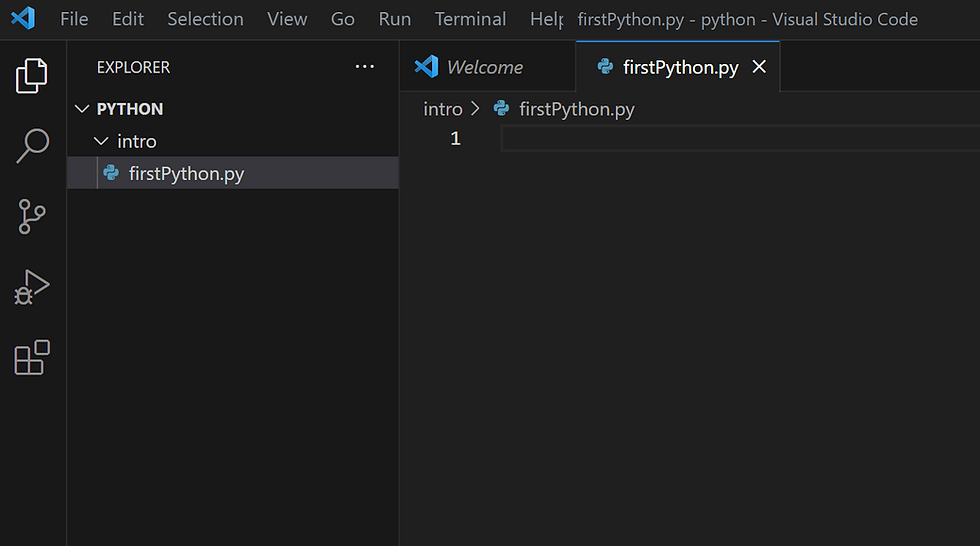
This is where your current session of VSCode will be running. The panel on the right hand side will show your current location's file structure and you can expand/collapse each folder (once you’ve created more) to see each of your files. You can create new folders and files directly in VSCode or in your file explorer and they will show up in this panel.
Create another folder for our current project called intro and within that folder create a python file firstPython.py. Adding the file extension .py at the end tells the computer how to handle the new blank file and, in our case, that it will contain python code.
Let’s throw some simple code into the file for now:
s= "Hello world!"
for i in range(len(s)):
    print(s[i])
Plug-ins
We aren’t quite done yet. Before we can start hacking away, we’ll need a few plug-ins and extensions to make our code development smoother.
A plugin is a piece of software that can be downloaded, usually on top of an existing piece of software, that extends its capabilities or adds additional features. VSCode has literally thousands of plug-ins available but to get started we only need a couple.
First up is the Python extension from Microsoft, which allows VSCode to assist you in python formatting, syntax, variable identification, running and testing your code, and so much more. It also includes IntelliSense, which helps with code completion - think of it as autocorrect for coding. It’s definitely an essential part of your IDE, unless you want to make your life much harder for no real reason.
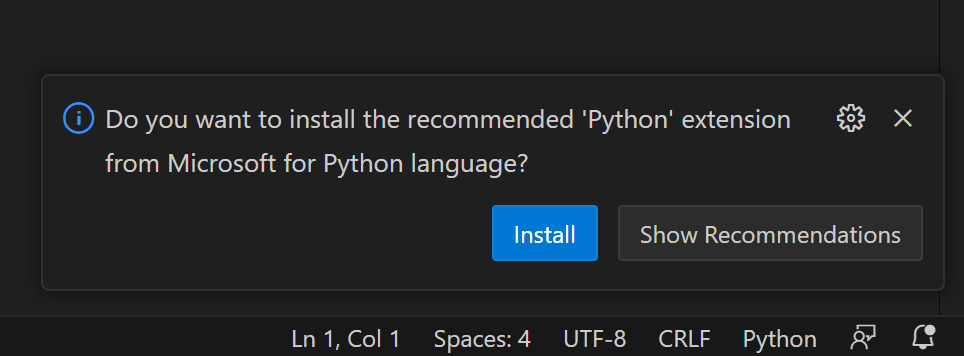
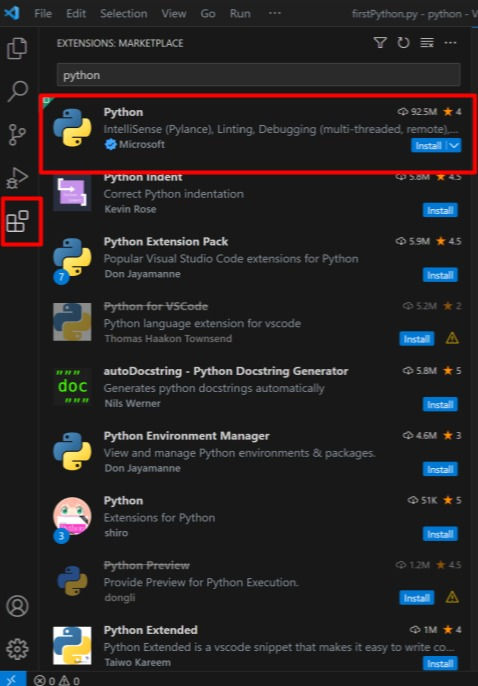
Because VSCode is so smart, it might even have prompted you to download the python extension when you created the python file earlier. But we can also easily install it by finding the Extensions menu along the right side of the window. It's the one that looks like a Tetris block with one of the pieces broken off.
In the extensions marketplace, type “python” into the search bar. The Microsoft Python extension should be the first result and have +90 million downloads, that’s the one we want. Click install.
Up next is Prettier. This extension is completely optional but it helps with formatting, improving readability, and making your code, well, prettier. The python extension will take care of most of your Python formatting, but this one is handy to have once you move to other file types or use data files.
To download this one search "Prettier" in the extensions marketplace and install it the same way as the python extension.
Running code in VSCode
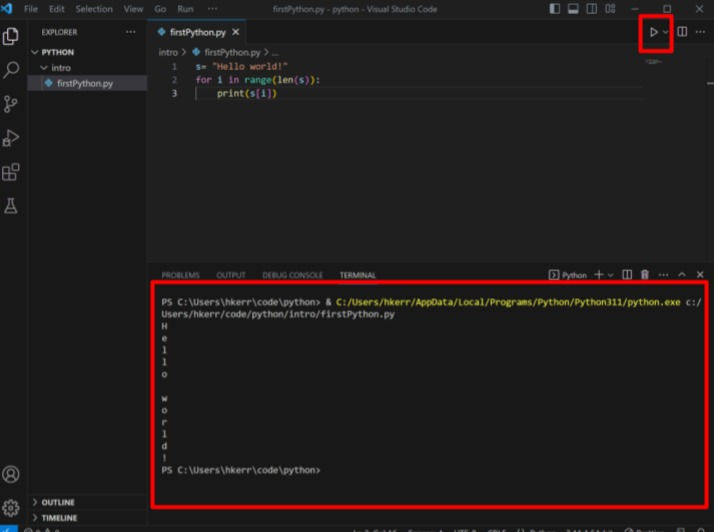
All that’s left now is to run our code in our development environment, which you can conveniently do right within VSCode.
In the top left corner there’s a play button that looks like a little triangle. Pressing this will pop up a terminal within VSCode, run the file, and print out any output from your program. Any errors would also be displayed here and the drop down arrow beside the Run button will allow you to debug your program.
But we don’t need to invite that energy in for now so we'll only focus on the terminal perfectly executing our perfect code (errors are inevitable though so keep an eye out for an article on debugging in the future).
The code we threw in earlier will print out “hello world” with each letter on a new line. Give running it a go and your terminal should look like this.
תגובות